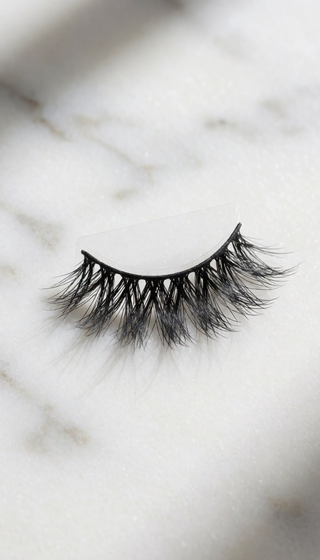
Why Your Lash Corners Keep Lifting (And How to Fix It)

It's 7:47 AM. You're running late, you just applied the most gorgeous pair of lashes — the curl is perfect, the band is thin, the look is flawless — and then you glance in the rearview mirror at a red light and see it. The outer corner of your left lash has curled up like a tiny, stubborn wing.
Sound familiar?
I was like you but worse. I once had a lash corner peel back mid-photo shoot — a photographer's flash highlighting my dangling lash like a sad little flag. It was humiliating, and honestly it made me dread wearing lashes at all for a few months.
Here's the good news: lifting corners is one of the most common lash problems out there, and it almost always comes down to a handful of specific, fixable reasons. Once you understand WHY it happens, you can fix it today — not after weeks of frustration.
THE 5 REAL REASONS YOUR LASH CORNERS KEEP LIFTING
Before you blame your lashes, let me walk you through what's actually happening. Nine times out of ten, it's one of these five culprits.
1. THE BAND WASN'T FULLY DRY BEFORE APPLICATION
This is the number one reason, and it's so easy to get wrong. After you apply your lash adhesive along the band, you need to wait 20 to 30 seconds for it to become tacky — not wet, not dry, but tacky. Think of the texture of a Post-it note. If you press the lash on while the glue is still wet and slippery, the corners (which have the least surface contact with your skin) will slide right off.
The fix: After applying adhesive, wait a full 30 seconds. Blow on the band gently. Then, when you place it, press the center down first, then firmly press and hold each corner for at least 10 seconds with your fingertips or a lash applicator.
2. YOU'RE NOT PRESSING THE CORNERS LONG ENOUGH
Most people press the center of the lash band down, do a quick pinch at the ends, and call it done. But corners need at least 10 to 15 seconds of firm, sustained pressure to form a real bond. A quick pinch isn't enough — the adhesive at the very edge of the band barely touches your skin, so it needs more time and more pressure to set.
I tell everyone I work with: apply your lashes, then sit there and hold each corner like you mean it. Set a timer in your head. It feels excessive, but it makes a massive difference.
3. YOUR EYE SHAPE DOESN'T MATCH THE LASH BAND CURVE
Not all eye shapes are created equal, and not all lash bands are either. If you have rounder, wider-set, or more prominent eyes, a standard curved band might not actually match your lid shape. When the band curve doesn't match your natural eye curvature, the corners naturally lift because the band is fighting against your anatomy.
The fix: Look for lashes with a flatter, more flexible band if you have prominent or round eyes. You can also gently warm the band between your fingers for 5 to 10 seconds before applying — this softens it so you can bend and shape it to your eye's unique curve. Once you find the right shape match, corners stay down.
4. YOUR SKIN IS OILY AND THE GLUE CAN'T GRIP
This one catches people off guard. If you have oily eyelids — or if you applied your moisturizer, primer, or foundation too close to your lash line — the adhesive simply cannot bond to your skin. It slides on top of the oil like a car on ice. And the corners, being the thinnest contact point, are always the first to go.
The fix: Before applying any lashes, wipe your eyelid with a gentle astringent or oil-free cleanser (micellar water works beautifully). Let it dry completely. Skip eye cream on your lash line on days you're wearing lashes. If you're very oily, you can also dust a tiny bit of translucent powder on your lid first, let it sit for 30 seconds, then apply your lashes — the powder gives the adhesive something to grip.
5. THE LASH BAND IS TOO STIFF OR THE WRONG LENGTH
Some lash bands are made with thicker, stiffer materials that simply don't flex with your eyelid movement. Every time you blink, smile, or move your face, the band fights back — and eventually it wins. The corners peel up. Additionally, if your lashes are too long for your natural lash line, the weight of the extensions at the outer corner can literally pull the band up over time.
The fix: Choose lashes with a thin, flexible cotton or transparent band. These conform to your eye shape and move with you. If you love a dramatic look, go for volume in the middle and center of the lash rather than length at the corners.
A QUICK TROUBLESHOOTING GUIDE: WHAT'S CAUSING YOUR LIFT?
Not sure which of the five reasons above is your culprit? Here's a fast diagnostic:
| YOUR SYMPTOM | MOST LIKELY CAUSE | QUICK FIX |
|---|---|---|
| Both corners lift within 30 minutes | Glue not tacky enough / not pressed long enough | Wait 30 sec, press corners 15 sec each |
| Only the outer corner lifts | Band curve doesn't match eye shape | Warm band, reshape, use flatter band style |
| Corners lift after a few hours | Oily skin breaking down the bond | Prep lid with micellar water, powder first |
| Corners lift by end of the day | Band too stiff or lash too heavy | Switch to thin, flexible band lashes |
| Corners lift when you smile or talk | Band isn't flexible enough for facial movement | Choose wispy, lightweight styles with soft bands |
Read through this table honestly — most of my clients discover they've been dealing with reason #1 or #4 for months without realizing it. The fix takes literally 60 extra seconds.
WHAT TO LOOK FOR IN A LASH THAT STAYS PUT
Now that you know exactly why corners lift, here's what I'd tell you to look for when choosing your next pair of lashes — whether it's your 10th pair or your 100th:
- A thin, flexible band — This is non-negotiable. If the band feels like a piece of plastic, put it back. You want something that bends when you flex it between your fingers. Thinner bands conform to your lid and resist lifting.
- A design that doesn't rely on messy glue application — The less adhesive manipulation required, the less room for human error. Some lash designs are engineered so the band itself does the work.
- Weight distribution that centers volume — Heavier at the outer corner is the enemy. Look for lashes where the drama is in the center or evenly distributed.
- A band shape that matches your eye — Flatter bands for rounder eyes. More curved bands for deeper-set eyes. It should feel like the lash was made for your eye, not forced onto it.
- Reusable design — If you're tired of reapplying every single day, look for a pair built to be worn again and again. It should snap back into place each morning like it's no big deal, because honestly, it shouldn't be.
When I started applying these criteria, my corner-lifting days dropped from "every single wear" to "maybe twice a year." The right lashes genuinely change the experience.
I started paying attention to what actually makes lashes stay put — the band quality, the application method, the prep work — and it led me to PHANSTA LASHES. They're designed with a flexible band that conforms to your eye shape on contact, no messy adhesive required. The kind of thing you put on once and forget about — because your lashes look incredible and you're not checking the mirror every 20 minutes to make sure nothing's peeling.
Beautiful lashes without messy glue, lifting corners, or the panic of a mid-event peel-off. That's the standard — and it's completely achievable.
FREQUENTLY ASKED QUESTIONS
How do I fix a lifted lash corner that already happened mid-day?
Don't panic and don't peel the whole lash off. Take a cotton swab, dip the tip in a tiny bit of lash adhesive, and dab it under the lifted corner. Press the corner down firmly for 15 to 20 seconds. Hold it. Don't let go. It'll re-bond. If you don't have adhesive with you, a small dot of clear-drying lash-safe glue or even a tiny piece of tape can work in a pinch — just be gentle when removing it later.
Is it normal for lash corners to lift on both sides?
Yes, and when it happens on both sides, it's almost always a prep or glue issue rather than a shape issue. Double-check that you're waiting long enough for tackiness and pressing both corners for a full 15 seconds each. If you're doing all of that and both corners still lift, your skin's oil production might be the culprit — prep with micellar water and a light dusting of powder.
Can I reuse lashes after fixing a lifted corner?
Absolutely. Once you've re-bonded the corner, let the lash fully set before blinking hard or touching it again. When you remove the lash that evening, clean the band gently with oil-free makeup remover and store it back on its tray. You'll get multiple wears out of a well-cared-for pair.
Do strip lashes always lift at the corners eventually?
They shouldn't. A well-designed lash with a flexible band, applied to a properly prepped lid, should stay put for a full day of wear. If you're consistently seeing corner lift no matter what you do, the issue is the lash design itself — the band is too stiff or too curved for your eye shape. It's not you, it's the lash.
What's the fastest way to apply lashes so they don't lift?
The fastest reliable method I've found: apply adhesive, wait 30 seconds, place the lash starting at the center, press each corner for 15 seconds, then gently pinch your natural and false lashes together with your fingertips for 5 seconds. Total extra time: about 60 seconds. Total result: a full day with zero lifting.
Experience the Difference of PHANSTA LASHES
Quick to apply, gentle on eyes, beautiful all day.
SHOP PHANSTA LASHES — GLUE-FREE, 30+ WEARS →📚 Browse our complete library of lash guides →
STILL COMPARING OPTIONS? Explore our guides on finding your perfect lash, magnetic vs strip, and sensitive eyes.
FIND THE PERFECT LASH — Not sure which style suits you? Take the 30-second lash finder quiz →