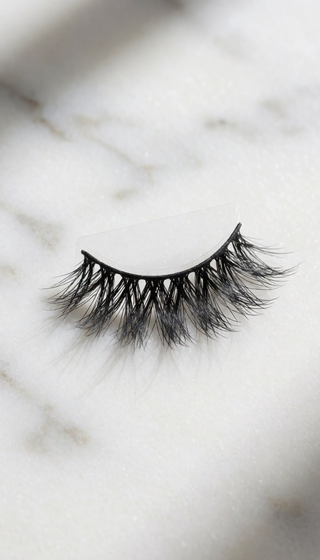
PERFECT APPLICATION: YOUR STEP-BY-STEP GUIDE TO STRIP FALSE EYELASHES
If you've ever struggled with strip lashes that lift at the corners, feel heavy, or simply won't stay put, you're not alone — and the problem almost never comes down to your natural lashes. Perfect strip lash application is a skill built on preparation, the right adhesive, and a few professional techniques that take less than five minutes to learn. This guide walks you through every step, from choosing the right band to making your lashes last all day without irritation or fuss.
UNDERSTANDING STRIP LASHES: WHAT YOU'RE WORKING WITH
Strip lashes are a single row of synthetic or natural hair fibers attached to a thin band that sits along your lash line. Unlike individual cluster lashes or salon-applied extensions, strip lashes are designed for at-home use and come in a range of densities, lengths, and curl patterns. The band can be made from cotton, clear plastic, or a flexible polymer — and the material matters more than most people realize. A cotton band holds adhesive well but can feel stiff. A clear band blends seamlessly with your lash line but may lift if the adhesive isn't applied correctly. A flexible polymer band conforms to your eye shape and is often the most comfortable for all-day wear.
The adhesive is equally important. Traditional lash glue contains latex and formaldehyde-releasing preservatives, which are common irritants. If you've ever experienced redness, itching, or swelling after application, the adhesive — not the lashes — is likely the culprit. This is why the band material and the adhesive formula work together as a system, and why choosing both carefully is the foundation of a comfortable, long-lasting application.
PREPARATION: SETTING YOURSELF UP FOR SUCCESS
The most common application failures happen before the lashes ever touch your eyelid. Proper preparation takes about two minutes and makes every subsequent step easier.
- Cleanse your lash line thoroughly. Oil, residual mascara, and skincare products create a barrier between the adhesive and your skin. Use an oil-free cleanser or micellar water on a cotton pad, then let your lash line dry completely — even a thin layer of primer can prevent the adhesive from bonding properly.
- Curl your natural lashes first. Always apply your lash curler before strip lashes, never after. Curling after application can dislodge the band or create an unnatural angle where your natural lashes and the strip lashes point in different directions.
- Apply a thin coat of mascara. A single coat of mascara on your natural lashes before applying strip lashes gives the adhesive something to grip and helps your natural lashes blend with the falsies. Wait 30 seconds for it to dry so it doesn't transfer onto the strip lash band.
- Trim the band to fit your eye. Never apply a strip lash without checking the fit. Hold the lash up to your lash line and trim any overhang from the outer corner only — trimming the inner corner can cause the band to lift throughout the day.
THE STEP-BY-STEP APPLICATION PROCESS
- Apply adhesive along the entire band. Using the nozzle of your lash adhesive, run a thin, even line along the entire length of the band. Pay extra attention to the inner and outer corners, which are the first points to lift. If your adhesive comes with a fine-tip applicator, use it to place a slightly thicker dot at each corner.
- Wait 30-45 seconds for the adhesive to become tacky. This is the single most important step that most beginners skip. Freshly applied glue is too wet to bond — it will slide around and lift immediately. Blow gently on the band or wave it in the air for 30 seconds. The adhesive should feel sticky to the touch, not wet.
- Position the band as close to your natural lash line as possible. Using tweezers or a lash applicator, place the strip lash directly on top of your natural lash line — not on your eyelid skin, and not on top of your natural lashes. The band should sit flush against the base of your natural lashes with no visible gap.
- Press and hold for 10-15 seconds. Using the flat side of the tweezers or your fingertip, press the band along the entire lash line, starting from the center and working outward. Apply gentle, even pressure — don't press so hard that the band bends or warps.
- Secure the corners. The inner and outer corners are where lifting begins. Use the tip of your tweezers to pinch your natural lashes and the strip lash band together at each corner, holding for an extra five seconds each.
- Blend with a lash curler or coat of mascara. If needed, gently clamp your natural and strip lashes together with a curler. A thin coat of mascara applied from below can also help blend the two layers — but use a light hand, as too much mascara adds weight and can cause the band to slide.
COMMON MISTAKES AND HOW TO AVOID THEM
Even experienced wearers fall into these traps. Knowing what to watch for can save you from a midday lash emergency.
- Applying glue and immediately placing the lash. The adhesive needs time to get tacky. If you apply and place within seconds, the bond will be weak from the start.
- Placing the band on eyelid skin instead of the lash line. This creates a visible gap, an unnatural look, and rapid lifting. Always place the band at the root of your natural lashes.
- Skipping the corner reinforcement. The inner and outer corners bear the most movement from blinking and facial expressions. A five-second extra press at each corner dramatically extends wear time.
- Using old or dried-out adhesive. Most lash adhesives have a shelf life of 3-6 months after opening. If your glue has thickened, turned yellow, or become stringy, it will not bond properly. Replace it.
- Over-applying mascara after placement. Heavy mascara adds weight and moisture to the band, weakening the adhesive bond. One light coat is enough.
- Peeling lashes off without remover. Pulling strip lashes off dry can pull out your natural lashes and damage the delicate skin of your eyelid. Always use an oil-based remover or warm water to dissolve the adhesive first.
AFTERCARE: MAKING YOUR LASTS LAST
Proper aftercare can extend the life of your strip lashes significantly and protect your natural lashes and eyelid skin.
- Remove gently every time. Soak a cotton pad with an oil-based eye makeup remover, hold it against your closed eyelid for 20-30 seconds to dissolve the adhesive, then slide the band outward from the inner corner. Never pull or tug.
- Clean the band after each use. Once removed, use a cotton swab dipped in rubbing alcohol or micellar water to remove dried adhesive residue from the band. Let it air dry completely before storing.
- Store in the original tray. Keeping the band curved in its original shape prevents warping and extends the usable life of the lashes.
- Avoid water for the first hour. If you've just applied your lashes, avoid steam, swimming, or heavy sweating for at least 60 minutes to let the adhesive cure fully.
- Never sleep in strip lashes. Sleeping with strip lashes on puts pressure on the band, can bend or warp the lashes, and increases the risk of the adhesive transferring onto your pillow and into your eyes.
WHAT TO LOOK FOR IN A QUALITY STRIP LASH
Not all strip lashes are created equal. If you're tired of the irritation, the lifting, and the daily struggle with traditional glue-based lashes, here's what separates a genuinely comfortable lash from the rest:
- A glue-free or irritation-free bonding system. Traditional lash glue is the number one cause of redness, itching, and swelling. A quality alternative uses a bonding mechanism that doesn't rely on harsh adhesives — eliminating the most common source of discomfort entirely.
- A flexible, lightweight band. The band should conform to your eye shape without stiffness. A rigid band creates pressure points and lifts at the corners.
- Reusability without degradation. A well-made lash should maintain its shape, curl, and bonding ability across multiple wears — not just one or two applications.
- A style range that matches your eye shape. Different eye shapes need different lash designs. A brand that offers multiple styles ensures you can find one that sits flush against your lash line without overhang or gaps.
- Waterproof and sweat-resistant performance. Whether you're at a wedding, a workout, or a humid summer day, your lashes should stay in place without requiring constant adjustment.
PHANSTA LASHES: GLUE-FREE MICRO-ADHESION, 30+ WEARS
PHANSTA LASHES were designed to solve every problem outlined above — without compromise. Instead of traditional glue, PHANSTA uses a proprietary micro-adhesion technology that bonds directly to your natural lash line in seconds, with no latex, no formaldehyde, and no irritation. The result is a lash that feels weightless, stays secure through workouts and tears, and removes cleanly without damaging your natural lashes.
With 17 styles engineered for different eye shapes and occasions, a waterproof build, and a wear life of 30+ applications per pair — at under $2 per wear — PHANSTA LASHES deliver the comfort and longevity that glue-based strip lashes simply can't match. They're hypoallergenic, require no adhesive, no magnets, and no liner, and each pair takes seconds to apply per eye.
- Glue-free micro-adhesion — no irritation, no latex, no formaldehyde, no sticky residue
- 30+ wears per pair — under $2 per wear, outperforming traditional strip lashes on durability
- 17 styles for every eye shape — from natural everyday to dramatic evening looks

FREQUENTLY ASKED QUESTIONS
How do strip lashes stay on without glue?
Strip lashes can stay on without traditional glue using micro-adhesion technology, which creates a bond directly against your natural lash line through tiny adhesive points rather than a liquid glue layer. This method holds the band securely without latex, formaldehyde, or the irritation associated with conventional lash adhesives.
Are glue-free strip lashes safe for sensitive eyes?
Yes — glue-free strip lashes are specifically designed for sensitive eyes because they eliminate the primary irritant: traditional lash adhesive. Without latex or formaldehyde-releasing preservatives, the most common causes of redness, itching, and swelling are removed entirely, making them suitable even for contact lens wearers and allergy-prone users.
How long does it take to apply strip lashes?
With practice, a single strip lash can be applied in seconds per eye. The most time-consuming step is waiting 30-45 seconds for traditional adhesive to become tacky — a step that glue-free micro-adhesion systems eliminate entirely. Most first-time users achieve a secure fit within one to two attempts.
Can you reuse strip lashes?
Yes, quality strip lashes can be reused many times if they're removed gently and the band is cleaned after each use. Dried adhesive residue should be removed with a cotton swab, and the lashes should be stored in their original tray to maintain the band's shape and curl.
What's the difference between strip lashes and magnetic lashes?
Strip lashes are a single band placed along the lash line, while magnetic lashes use small magnets that sandwich your natural lashes between two strips. Magnetic lashes can be uncomfortable for some wearers because of the weight and pressure on natural lashes, and they don't work as well on very fine or sparse lashes. Strip lashes with micro-adhesion offer a lighter, more comfortable alternative without magnets.
NOT SURE ABOUT YOUR EYE SHAPE?
Find your eye shape and get personalized lash recommendations:
FIND THE PERFECT LASH FOR EVERY MOMENT
Explore our occasion-specific lash guides:
EXPERIENCE THE DIFFERENCE
Join thousands of women who have made the switch. No glue, no damage, no salon appointments — just beautiful lashes in seconds.
SHOP PHANSTA LASHES — GLUE-FREE, 30+ WEARS →