FALSE EYELASHES FOR BRIDES: WEDDING DAY LASH GUIDE
 You've booked the venue, tasted the cake, found the dress — and somewhere between the seating chart and the "day-of" timeline, a quieter question surfaces: what is actually happening with your eyelashes on the morning you walk down the aisle? Brides ask this constantly, and the honest answer is that most wedding-day lash advice stops at "apply your favorite strip." That's like telling a marathon runner to wear whatever shoes are in the closet. Your wedding lashes need to be treated with the same intention as every other detail you've obsessed over for months.
Key Takeaway: Wedding-day false lashes require 48-hour trial wear, a lash band that disappears in photographs, moisture-proof application, and a strategic plan for removal at the end of the night. Choose lashes that are lighter than you think you need, do a full dress rehearsal in them, and keep a touch-up kit in your emergency bag. The goal is lashes that look natural in close-up photos but hold through tears, humidity, and 12+ hours of wear.
Frequently Asked Questions
How long do PHANSTA LASHES last?
PHANSTA LASHES can be worn all day and reused multiple times with proper care. A single pair typically lasts 10-15 wears when stored and cleaned correctly, making them an excellent value compared to traditional strip lashes.
Are PHANSTA LASHES safe for sensitive eyes?
Yes. PHANSTA LASHES are made with hypoallergenic materials and require no adhesive, making them ideal for sensitive eyes, allergy sufferers, and contact lens wearers.
How do I apply PHANSTA LASHES?
PHANSTA LASHES apply in seconds — simply measure, trim if needed, and press onto your lash line. No glue, no drying time, no mess.
Can I reuse PHANSTA LASHES?
Absolutely. PHANSTA LASHES are designed for multiple wears. Clean them gently after each use and store in the original tray to maintain their shape and adhesive properties.
Why Wedding-Day Lashes Are a Completely Different Category
Wedding eyelashes exist in their own universe, separate from date-night lashes, photoshoot lashes, or even gala lashes. The reasons are physical, emotional, and photographic — and understanding them changes every choice you'll make. The wear-time math most brides underestimate The average bride wears her wedding lashes for 12 to 14 hours, according to makeup artists who specialize in bridal beauty. Your ceremony may be 30 minutes, but the lash clock starts at 8 a.m. when you sit in the makeup chair and doesn't stop until you peel them off past midnight. Compare that to a typical evening event — maybe 5 to 6 hours — and you're working with double the wear time, double the adhesive stress, and double the chance of lifting at the corners. The tear variable no one plans for Makeup artists report that the average bride cries between two and four times on her wedding day — and that's not counting happy tears during the ceremony itself. Each time tears hit your lash line, they break down the adhesive bond at the band's edge. This is why corner lifting is the number-one bridal lash complaint, and why it almost always happens during vows or the first dance. The photograph factor that changes everything Wedding photographers are trained to shoot at apertures like f/2.8 or f/1.8 for those creamy blurred backgrounds, which means the focal plane sits directly on your eyes. Any visible lash band, any clumping, any lifting at the outer corner will be captured in sharp detail — and those images last generations. Candid shots during emotional moments are taken at close range, making lash mistakes even more visible than they were in person.
How to Choose the Right Lash Style for Your Wedding Day
Not every false lash is built for the demands of a wedding. Here's how to evaluate your options against the specific challenges you'll face. The weight question: lighter is almost always better The instinct is to reach for the most dramatic lashes on the shelf. Resist it. Every gram of weight at the lash line adds gravitational pull that works against your adhesive for 12+ hours. Lashes weighing under 0.03 grams per strip are considered lightweight by lash extension standards, and that's the territory you want to be in. The goal is fullness that reads in photographs — not weight that droops by the reception. Band thickness and material: the invisible factor Lash bands fall into three categories relevant to brides: - Cotton thread bands: Visible and slightly rigid. These tend to catch light in flash photography and create a dark line above your natural lash line. Avoid for weddings. - Clear bands: Transparent and lightweight, making them excellent for natural looks. However, they can stiffen after adhesive application and may show as a faint line in extreme close-ups. - Ultra-thin flexible bands: The standard for bridal work. These hug the curvature of the eye, sit flush against the natural lash line, and disappear in photographs. Look for bands under 0.2mm in thickness. Length and curl for your eye shape Round, lifted lashes with length concentrated in the center — often called "open-eye" or "doll-eye" styles — photograph beautifully because they make the eye appear larger and more awake. This matters when your photographer is shooting at 7 a.m. during candid getting-ready shots. Almond-shaped eyes can handle more uniform distribution, while hooded eyes benefit from longer lashes at the outer corner to create a lifting effect. The key is proportion: lashes that extend past your natural lash line by more than 3mm will look dramatic but risk weight-related lifting by hour eight.
The 48-Hour Rule: Why a Non-Negotiable Trial Run Matters
You wouldn't wear new shoes for the first time on your wedding day. The same logic applies with ten times the force when it comes to your lashes. What a trial run actually tests A proper lash trial is not just about looking in a mirror. It's a diagnostic session that tests four specific variables:- Adhesive compatibility: Your skin's chemistry affects how adhesive bonds. An oily eyelid requires a different adhesive than a dry one, and a trial run will reveal this within the first hour of wear.
- Allergic reaction window: Lash adhesive contains cyanoacrylate, and reactions can appear 24 to 48 hours after first exposure. Testing on a Tuesday gives you time to recover if your skin reacts before Saturday's ceremony.
- Weight tolerance: Wear the lashes for at least 6 hours during your trial. If they feel heavy at hour 3, they'll be unbearable at hour 12.
- Lifestyle compatibility: Do a normal day — run errands, wear your glasses, look at your phone. You're testing how the lashes hold up against the micro-movements of daily life, because your wedding day will include all of those plus sweat and tears.
Application Technique: The Steps That Make Lashes Survive 14 Hours
Even the perfect lashes will fail without proper application. Here is the technique professional bridal makeup artists use, step by step. Preparation of the natural lash line Every millimeter of oil, primer, or leftover mascara at the lash line weakens adhesive bond. Cleanse the eyelid with an oil-free makeup remover, then wipe the lash line with a micellar water on a cotton swab. Follow with a gentle blotting — do not apply moisturizer, eye cream, or primer within one centimeter of the lash line. Some artists even recommend wiping the lash line with a small amount of rubbing alcohol on a cotton pad to remove residual oil, though this is debated for sensitive skin. Measuring and trimming before application Never apply a strip lash straight from the tray. Hold it against your lash line with tweezers, identify where the inner corner starts and where the outer corner ends, and trim the band to match. Lashes that are even 2mm too long at the outer corner will catch on movement and lift within an hour. Trim from the outer corner only — never the inner corner, which needs to sit flush against your tear duct. The adhesive application that actually works Apply a thin line of lash adhesive along the entire band. Then — and this is the step most people skip — wait 30 to 45 seconds. The adhesive needs to reach a tacky, semi-transparent state before it touches your skin. If applied while still wet, it slides and bonds poorly. If applied after it's fully dry, it won't bond at all. During this waiting period, blow gently on the band with your mouth or use a small fan to accelerate the process. Placement against the natural lash line Using tweezers or a lash applicator, place the strip as close to your natural lash root as possible. The band should sit flush against your skin with no visible gap. Press the band down along its entire length — inner corner, center, outer corner — holding each section for 10 seconds. The inner corner is the most vulnerable to lifting, so give it extra attention. The sandwich technique for maximum hold Once the false lash is secured, apply a coat of your own mascara to your natural lashes — just the roots, not the tips — and then use a clean spoolie to brush your natural lashes upward into the false lash. This fuses the two together at the root and eliminates any gap that could catch on movement. Some artists also apply a thin line of adhesive along the top of the band after this step, pressing it against the natural lash with a spoolie.The Sweat, Tear, and Humidity Problem: How Wedding Conditions Attack Your Lashes
Your wedding day creates a perfect storm of lash-damaging conditions. Understanding what you're up against helps you choose the right defenses. Sweat and humidity Outdoor ceremonies, crowded dance floors, and summer weddings all create humidity that breaks down adhesive faster. Cyanoacrylate adhesive — the primary ingredient in most lash glues — degrades faster in humid conditions because moisture accelerates its curing process, causing it to become brittle rather than flexible. A lash adhesive designed for high humidity will contain additives that slow this process, maintaining a flexible bond even in 80% humidity. Tears: the chemistry of crying on your lashes Human tears are not pure water. They contain salt, enzymes, and proteins that are specifically hostile to cyanoacrylate bonds. When tears flow down your face and hit the lash line, they weaken the adhesive at the point of contact — almost always the inner corner first, since tears collect there before rolling down the cheeks. This is why bridal makeup artists recommend pressing (not wiping) tears away with a tissue held beneath the lower lash line, never dabbing at the upper lash line. Wind and outdoor elements Outdoor ceremonies, rooftop receptions, and open-air photo shoots create wind that can catch the edges of false lashes, particularly longer styles. A shorter lash with a flexible band handles wind far better than a dramatic, long style. If your ceremony is outdoors, choose lashes that are 1-2mm shorter than your natural lash length — they'll move with the wind rather than catching against it.The Removal Strategy: Protecting Your Natural Lashes at Midnight
After 14 hours of wear, your lashes are ready to come off — but the way you remove them matters as much as how you applied them. Why the midnight peel is dangerous After hours of adhesive curing and bonding, pulling a lash strip off quickly will take 5 to 10 natural lashes with it. The adhesive has bonded not just to your skin but to the root of your natural lashes, and ripping it off creates tension that can damage the follicle. Over repeated cycles, this can cause permanent lash loss — something no bride wants to discover in her honeymoon photos. The proper removal sequence- Soak a cotton pad with an oil-based makeup remover or coconut oil.
- Hold it against your closed eyelid for 60 seconds, letting the oil dissolve the adhesive at the band.
- Gently slide the band outward from the inner corner — never pull upward.
- If resistance is felt, apply more oil and wait another 30 seconds. Never force removal.
- Once the strip is off, clean the remaining adhesive from your lash line with a cotton swab dipped in micellar water.
What to Look for in a Bridal Lash Solution: The Buying Criteria
With all of this in mind, what should you actually be looking for when you choose your wedding-day lashes? Here's the checklist that turns all the above guidance into purchasing decisions. Essential criteria for bridal lashes- Ultra-thin flexible band (under 0.2mm): Disappears in photographs, hugs the eye curvature, and reduces weight-related lifting.
- Lightweight construction (under 0.03g per strip): Minimizes gravitational pull over 12+ hours of wear.
- Open-eye or doll-eye style: Creates a wide-awake appearance that reads beautifully in close-up candid photographs.
- Water-resistant or humidity-adaptive adhesive compatibility: Choose lashes that work with a specific adhesive formulated for long wear — not the generic adhesive that comes in the package.
- Minimal outer-corner length: Lashes that extend more than 3mm past your natural outer corner are at higher risk of lifting and catching on movement.
- Hypoallergenic materials: Silk or faux-mink strips are generally less irritating than synthetic fibers for sensitive eyes, which matters when you're wearing them for 14 hours.
Why PHANSTA LASHES Are Built for Exactly This Moment
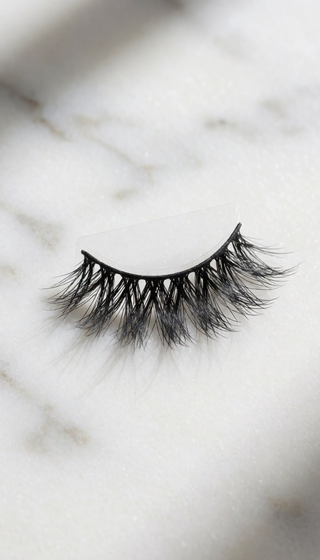
After everything we've covered — the weight requirements, the band thickness, the adhesive compatibility, the 14-hour wear test — here's what that criteria looks like when it's actually built into a product. PHANSTA LASHES are designed for the specific demands that brides face. The ultra-thin flexible band sits flush against your lash line and disappears in flash photography — no dark line, no visible edge in your close-up shots. The open-eye style creates that wide-awake, luminous look that wedding photographers love, and the lightweight construction means you're not fighting gravity by the time the last dance rolls around. What makes PHANSTA LASHES different for the wedding context is that they're engineered to work without traditional glue. The no-glue design eliminates the single biggest point of failure for bridal lashes — adhesive breakdown from tears, sweat, and humidity. No adhesive means no adhesive to degrade over 14 hours, no chemical reaction when tears hit your lash line, and no residue to worry about when you finally take them off at midnight. The practical benefit is enormous: you get the security of a lash that stays put through your vows, your first dance, and the emotional toast from your maid of honor — without the risk of corner lifting that plagues even the best glue-applied lashes by hour ten. And because there's no adhesive involved, your natural lashes are never subjected to the bond-and-rip cycle that causes breakage. For your wedding day, the checklist we walked through — lightweight, flexible band, invisible in photos, no adhesive breakdown, secure through tears — is the design brief PHANSTA LASHES were built from.The Final Word: Walk Down the Aisle with Lashes That Hold
Your wedding day is not the day to experiment. It's the day to execute a plan you've already tested, trusted, and rehearsed. The guidance above — the 48-hour trial run, the lightweight band, the adhesive-free security, the proper removal sequence — isn't theoretical. It's the collective experience of hundreds of makeup artists who have watched brides struggle with failing lashes at the worst possible moment and have reverse-engineered the solution. Choose lashes that are lighter than you think you need. Test them before the big day. Plan your application technique like you're rehearsing a speech. And when you look at your wedding photographs decades from now, you won't be thinking about your lashes at all — you'll be seeing your eyes, bright and clear, in the exact moment you said yes. That's the goal. Make the choice that gets you there.Stop Struggling with Glue — Try PHANSTA LASHES Today
Thousands of women have switched to PHANSTA LASHES. No glue, no damage, no complicated application. Just beautiful lashes that stay perfect all day.
SHOP PHANSTA LASHES →