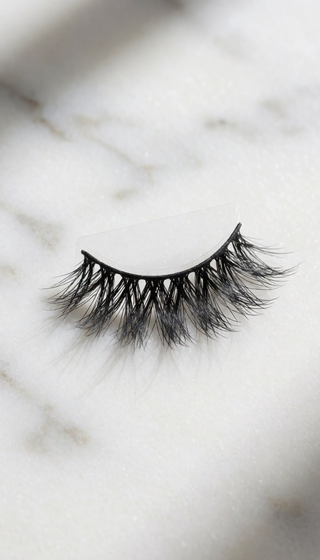
False Lashes Not Sticking? 7 Fixes for Lifting Corners

You spent 15 minutes carefully applying your lashes. You blinked a few times, checked in the mirror, and thought — finally, these are perfect. Then, halfway through dinner, you feel it. That dreaded little flutter in the corner. You excuse yourself to the bathroom, and sure enough, the outer edge of your lash band is curling up like a tiny crescent moon.
False lashes not sticking is probably the #1 complaint I hear from every lash wearer — from total beginners to people who've been wearing falsies for years. And I get it. I once wore a pair to a wedding where the outer corners started lifting so badly during the ceremony that I spent the entire reception pressing them back down with a wet Q-tip in the bathroom.
Here's the good news: almost every lash-sticking problem has a fix. And I'm going to walk you through all of them — the same advice I give my friends, readers, and every woman who messages me panicked before a big event.
WHY YOUR FALSE LASHES WON'T STICK (THE SCIENCE)
Before we fix the problem, you need to understand what's actually happening. Your lash band sits on top of your natural lash line. For it to stay put, the adhesive needs to bond to both the band and your skin. When that bond breaks — even in one tiny spot — the band starts to lift.
Here are the most common culprits:
- Oil on your eyelid: Even a tiny amount of moisturizer, serum, or natural skin oil creates a barrier between the glue and your skin. It's like trying to tape something to a greased pan.
- Insufficient drying time: Lash adhesive needs to get tacky before it bonds. If you apply it and immediately press the lash on, the glue is still wet and slides right off.
- Too much or too little glue: Excess adhesive pools and never fully dries. Too little leaves gaps where the band can lift.
- Lash band not fitted to your eye: If the band is too long for your lash line, the ends won't have anything to stick to. They'll pop up within minutes.
- Applying over mascara: Mascara creates a bumpy, waxy surface. The lash band can't make full contact with your skin.
- Humidity and sweat: Moisture in the air or on your skin breaks down adhesive faster.
- Old or low-quality adhesive: Lash glue has a shelf life. Once it thickens or gets stringy, it won't hold like it used to.
Knowing why it's failing is half the battle. Now let's fix each one.
FIX #1: START WITH A COMPLETELY OIL-FREE EYELID
This is the fix that changes everything. Most people don't realize their primer, concealer, or moisturizer is sabotaging their lashes.
Here's what to do: after you finish your skincare and eye makeup, take a cotton pad soaked in micellar water or a gentle oil-free cleanser and swipe it across your entire eyelid — especially along the lash line and in the corners. Then wait 30 seconds for it to dry completely before applying anything else.
If you use an eye primer, apply it under your eyeshadow only. Keep the actual lash line bare. I started doing this two years ago and my lash wear time doubled overnight. One of my readers messaged me saying this single tip was "life-changing" — she went from 3 hours of wear to a full 9-hour workday.
FIX #2: LET THE GLUE GET TACKY BEFORE APPLICATION
This is the mistake I see most often. You squeeze the glue onto the band, then immediately press it onto your eye. But fresh, wet glue hasn't reached the tacky stage where it grips.
Instead: apply a thin, even line of adhesive along the entire lash band. Then wait 20-30 seconds. You can blow on it gently or wave it near a fan. The glue will go from shiny and wet to slightly matte and sticky. That's when you press it onto your lash line.
Think of it like double-sided tape — you let it sit for a second before pressing it onto the surface, right? Same principle. This one timing adjustment alone fixes about 40% of sticking issues.
FIX #3: TRIM YOUR LASH BAND TO FIT YOUR EYE
If the outer corner of your lash band extends past your actual lash line, it has nothing to adhere to. It will lift. Every single time.
Take the lash strip and hold it against your eye before applying glue. Check if the inner corner and outer corner both sit within your natural lash line. If the band is longer, use small scissors to trim from the outer end (you want to keep the inner corner shorter for comfort).
Most lash bands come in a one-size-fits-all length, but eye shapes vary a lot. A band that's even 1-2mm too long will cause corner lifting. I keep a pair of small manicure scissors in my makeup bag just for this.
FIX #4: USE THE RIGHT AMOUNT OF ADHESIVE
After you apply the glue to the band, check for two things: there should be no dry spots (especially at the inner and outer corners), and there should be no thick pools of glue sitting on the band.
A thin, even line is your goal. If you see globs, use a clean spoolie or a toothpick to spread it evenly. Extra glue at the corners is a common reason the outer edges lift — the glue never fully cures because there's too much of it, and it peels away from your skin.
If your adhesive has thickened and is coming out in clumps instead of a smooth line, it's time to replace it. Most lash glues last 4-6 weeks after opening. After that, the formula breaks down and loses its bonding strength.
FIX #5: SECURE THE CORNERS WITH A LASH APPLICATOR
Even with perfect glue and a trimmed band, the corners are the weakest point because that's where your eye moves the most — blinking, smiling, squinting.
After you press the band onto your lash line, use the flat end of a lash applicator or the back of a clean tweezers to press down firmly on the inner corner and outer corner. Hold each corner for 5-10 seconds. This gives the glue extra time to bond exactly where it's most likely to fail.
Think of it as "spot-welding" the corners. This takes maybe 10 extra seconds but can be the difference between lashes that last 4 hours and lashes that last all night.
FIX #6: AVOID MASCARA BETWEEN YOUR LASHES AND THE BAND
If you're applying mascara before your falsies, you're creating a bumpy, uneven surface for the band to sit on. The glue bonds to the mascara, not to your skin — and mascara flakes throughout the day, taking your lash bond with it.
Better approach: curl your natural lashes, apply a thin coat of mascara, let it dry completely (wait 60 seconds), then apply your falsies on top. If you want to blend your natural lashes with the falsies afterward, use a lash curler to clamp them together — don't add more mascara underneath.
Some people swear by applying a thin line of black eyeliner along the lash line before applying falsies. This serves two purposes: it creates a dark "grippy" surface for the band to stick to, and it hides any gap between the band and your skin if there's slight lifting.
FIX #7: CHECK YOUR ENVIRONMENT AND AFTERCARE
Are you wearing lashes in a hot, humid environment? Are you applying them right after a shower when your skin still has moisture? Are you touching or adjusting them throughout the day?
All of these things break down adhesive faster. If you know you'll be somewhere humid or you'll be sweating, set your lashes with a cool blast of hairspray on a lash curler (press the curler against the band and spritz lightly — let dry before wearing). This creates a mini seal.
After application, try not to touch, pull, or adjust the lashes. Every time you lift the band to reposition it, you're breaking the glue bond in that spot. If something feels off within the first 30 seconds, remove the lash completely, clean off the old glue, and start fresh. Don't try to patch it — it won't hold.
QUICK COMPARISON: WHAT'S CAUSING YOUR LASHES TO LIFT?
| Symptom | Most Likely Cause | Best Fix |
|---|---|---|
| Both corners lifting immediately | Too much skin oil on lid, or band too long | Cleanse lash line, trim band to fit |
| Outer corner lifts after 1-2 hours | Band too long, or not enough glue at the corner | Trim outer end, add extra dot of glue at corners, press with applicator |
| Inner corner lifting | Moisture from tears or eye drops, overloaded glue | Use less glue at inner corner, blot with tissue before application |
| Entire band sliding around | Wet glue applied too soon, or low-quality/old adhesive | Wait 20-30 seconds for tacky stage, replace old glue |
| Lashes falling off completely within minutes | Very oily skin, or applying over wet mascara/moisturizer | Double-cleanse lash line, wait for full dry-down before applying lashes |
| Corners lift only when smiling/squinting | Band too rigid for your eye shape | Gently stretch the band in a U-shape before applying to increase flexibility |
Use this table to diagnose your specific issue. In most cases, it's one of the first three — and they're all solvable with the fixes above.
WHAT TO LOOK FOR WHEN NOTHING YOU TRY WORKS
If you've tried all seven fixes and your lashes still won't cooperate, it might not be a technique problem — it might be a product problem. Not all lash adhesives are created equal, and not all lash bands are designed to conform to real eye shapes.
Here's what I tell readers to look for when they're ready to try a different approach:
- A lash band that's already shaped to fit — pre-curved bands that don't need as much custom trimming
- Adhesive that's formulated for long wear — look for formulas that specifically promise all-day or multi-day hold
- A system designed to work together — when the band and the adhesive are designed as a pair, the bond is stronger
- Minimal prep required — the less you have to do to your skin and the lashes before application, the less room for error
When you find a product that checks these boxes, the difference is night and day. I've seen readers go from fighting their lashes for every event to literally forgetting they're wearing them.
THE SOLUTION THAT CHANGED THE GAME FOR MY READERS
After years of troubleshooting lash application for readers, I've seen the most dramatic results with a specific kind of lash: ones that are designed to grip your natural lash line without traditional glue — using a pressure-activated bonding strip along the band itself.
These are the lashes I personally reach for when I need zero prep, zero mess, and zero worry about corners lifting during a 12-hour day. The band bonds with gentle pressure from your fingertips or a curler, which means there's no waiting for tackiness, no sticky residue on your fingers, and no oil-sensitive adhesive to fight with.
My readers who switched to this style tell me the same thing over and over: "I didn't realize how much time I was spending on lash glue until I stopped using it." One reader told me she went from 15-minute lash applications to under 2 minutes. Another said she wore hers for a full 14-hour travel day and didn't think about them once.
If you're done with glue, done with lifting corners, and done with spending your bathroom breaks pressing your lashes back down — this is your next step.
FREQUENTLY ASKED QUESTIONS
How do I fix false eyelashes that won't stick at the corners?
The most common reason corners lift is that the lash band is too long for your eye, or there's excess oil on your skin at the outer corners. Trim the band to fit your lash line, make sure your eyelid is completely oil-free, and press the corners firmly with a lash applicator for 10 seconds after application.
What can I use if my false lashes keep falling off?
Check three things: (1) your adhesive is fresh — replace it if it's been open longer than 4-6 weeks, (2) your eyelid is fully clean and dry before application, (3) you're waiting 20-30 seconds after applying glue to let it get tacky. If you've tried all three and lashes still slip, your adhesive may not be strong enough for your skin type — people with oily skin often need a formula specifically designed for long wear.
Is it better to apply mascara before or after false lashes?
Apply mascara before false lashes — curl your natural lashes, apply one thin coat, let it dry for 60 seconds, then apply your falsies on top. Never apply mascara between your natural lash line and the lash band, as this prevents the adhesive from making direct contact with your skin.
How long should lash glue dry before applying?
Wait 20-30 seconds after applying adhesive to the lash band. The glue should change from shiny/wet to slightly matty/tacky. If it's still glossy when you touch it with your fingertip, give it another 10 seconds. Applying lashes on wet glue is the #1 cause of slipping and poor adhesion.
Why do my false lashes only last a few hours?
Short wear time usually comes down to one of these: oily eyelids creating a barrier, old adhesive that's lost its bonding strength, a lash band that doesn't fit your eye shape, or applying lashes in a humid environment. Review the seven fixes above — in most cases, cleansing the lash line thoroughly and letting the glue get tacky will dramatically extend your wear time.
Experience the Difference of PHANSTA LASHES
Quick to apply, gentle on eyes, beautiful all day.
SHOP PHANSTA LASHES — GLUE-FREE, 30+ WEARS →