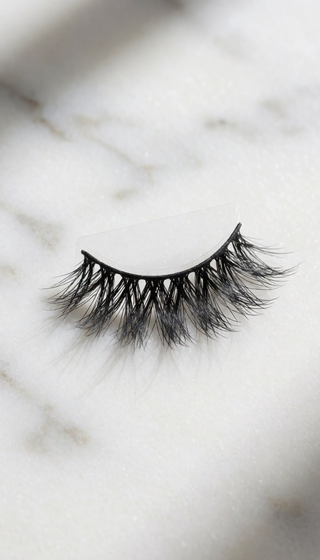
FLAWLESS APPLICATION: HOW TO APPLY FALSE LASHES FOR WEDDINGS

Here is the thing nobody tells you about wedding-day lashes: the application is only half the battle. The other half is staying power. You need a lash that survives tears of joy, humidity, fifteen hours of wear, and roughly two hundred photographs — all while looking utterly effortless. Most wedding tutorials stop at "apply along the lash line" and leave you to figure out why your outer corners are lifting before the first dance.
Key Takeaway: Wedding-proof false lashes come down to three non-negotiable elements — the right lash style for your dress and venue, a meticulous 48-hour prep routine, and an application technique that builds in redundancy at the corners where lifting begins. Master these, and your lashes will outlast your bouquet.
Frequently Asked Questions
How long do PHANSTA LASHES last?
PHANSTA LASHES can be worn all day and reused multiple times with proper care. A single pair typically lasts 10-15 wears when stored and cleaned correctly, making them an excellent value compared to traditional strip lashes.
Are PHANSTA LASHES safe for sensitive eyes?
Yes. PHANSTA LASHES are made with hypoallergenic materials and require no adhesive, making them ideal for sensitive eyes, allergy sufferers, and contact lens wearers.
How do I apply PHANSTA LASHES?
PHANSTA LASHES apply in seconds — simply measure, trim if needed, and press onto your lash line. No glue, no drying time, no mess.
Can I reuse PHANSTA LASHES?
Absolutely. PHANSTA LASHES are designed for multiple wears. Clean them gently after each use and store in the original tray to maintain their shape and adhesive properties.
This guide is built for the bride who has tried false lashes before and ended up peeling them off in the bathroom before the ceremony. It is for the maid of honor who wants lashes that look intentional at 9 AM and still flawless at midnight. It is for anyone who has ever googled "false lashes falling off" at 2 AM the night before a wedding and found nothing useful. We are going deeper.
Why Wedding Lashes Fail (And It's Not What You Think)
The number one reason wedding lashes lift, shift, or peel before the reception ends has almost nothing to do with your technique. It is the environment. Wedding days create a perfect storm of lash-destroying conditions that standard application methods were never designed to withstand.
- Emotional moisture: Tears — real ones — alter the pH and oil composition of your skin. A study published in the journal Cornea found that emotional tears contain higher concentrations of stress hormones and proteins than reflex tears, which changes how they interact with lash adhesives.
- Extended wear time: The average bride wears her lashes for 10 to 14 hours. Most traditional lash adhesives are tested for 6 to 8 hours of wear under controlled conditions.
- Temperature fluctuation: Moving between air-conditioned getting-ready spaces, outdoor photo sessions, and warm reception halls causes the skin's oil production to spike — and oil is the enemy of any lash bond.
- Touch frequency: You will touch your face more on your wedding day than on any ordinary day. Adjusting your veil, dabbing tears, hugging guests — every contact introduces moisture and friction to the lash line.
Understanding these four failure points is what separates a bride whose lashes look identical in the ceremony photos and the sparkler-sendoff photos from a bride whose are noticeably different. The technique below addresses each one directly.

Choosing the Right Lash Style for Your Wedding
Not every lash belongs on a wedding day. The style you choose should be dictated by three factors: your dress's aesthetic, your venue's formality, and the makeup look you have planned. A lash that is perfect for a beach ceremony at sunset can look completely wrong in a candlelit ballroom.
The Three Wedding Lash Archetypes
- The Natural Wispy: Lashes with alternating length patterns (typically 8–13mm) that create dimension without density. These suit outdoor ceremonies, boho or minimalist dresses, and brides who want a "no-makeup makeup" look. The goal is for guests to notice your eyes, not your lashes.
- The Romantic Flutter: Lashes with a subtle cat-eye taper — shorter at the inner corner (8–9mm), longest at the outer corner (12–14mm). This style lifts the eye shape and photographs beautifully from every angle. It works for classic, romantic, and vintage-inspired wedding aesthetics.
- The Drama Statement: Dense, multi-dimensional lashes with a criss-cross fiber pattern and lengths reaching 15–18mm. Reserved for evening receptions, glamorous ballgowns, and brides who want their makeup to carry across a large venue. These require stronger adhesive and more prep.
A Note on Lash Band Types
The band is arguably more important than the fibers when it comes to wedding-day wear. A cotton band is sturdy but visible in close-up photos. A transparent band disappears against the skin but can stiffen over hours of wear. A flexi-band — made from a soft, pliable polymer — conforms to the natural curve of your lid and moves with your eye, which dramatically reduces corner lifting.
For weddings specifically, look for lashes with a flexi-band that is under 0.5mm in thickness. Thin bands sit closer to your natural lash line, creating a seamless blend that photographs as if the lashes are growing from your own lids.

The 48-Hour Prep Protocol
The most impactful wedding lash application happens two days before the event, not the morning of. Your skin's oil production, hydration levels, and the condition of your natural lashes all affect how well a false lash bonds — and all three can be optimized in advance.
Two Days Before: The Reset
- Deep-cleanse your lids: Use an oil-free micellar water to remove any residual sebum from your lash line. Follow with a gentle, sulfate-free cleanser. Do not apply moisturizer or eye cream directly on the lash line — these create a barrier that prevents adhesive from bonding to the skin.
- Exfoliate the orbital bone (gently): Use a mild chemical exfoliant — something with lactic acid orPHA, never a physical scrub — around the eye area to remove dead skin cells that can cause a lash band to sit unevenly.
- Hydrate aggressively (but away from the lash line): Drink plenty of water and apply a hydrating eye cream, but keep it a full centimeter below the lash line and on the orbital bone, not on the lid itself.
The Morning Of: The Dry-Down
On the wedding day, cleanse your face as normal but then blot your entire eye area with a clean, lint-free cloth. Wait five full minutes before applying any makeup. Then apply your eye makeup — eyeshadow, liner, everything — but leave the lash line itself free of product. Any eyeshadow pigment on the lash line acts as a physical barrier between the adhesive and your skin.
If you are applying eyeliner, draw it slightly above the natural lash line, into the base of your natural lashes. This creates a dark "shelf" that the lash band will sit against, camouflaging any visible gap — but the adhesive itself is bonding to clean, bare skin.
The Step-by-Step Application Technique for Maximum Longevity
This is the core of what you came here for. Follow these steps in order, and do not rush. A proper wedding lash application takes 10 to 15 minutes per eye. That is normal.
Step 1: Measure and Trim
Hold the lash strip against your upper lash line using a pair of blunt-tipped scissors or a lash applicator. Count how many millimeters extend past your outer corner — typically 3 to 5mm. Trim only from the inner corner (the shorter end). Trimming the outer corner removes the fibers that create the lifted, eye-opening effect, and the inner corner is where lifting begins.
Step 2: Soften the Band
Take the lash strip and gently flex the band back and forth five to seven times using your thumb and forefinger. This is especially critical for flexi-bands, which are often stiffer out of the package. A softened band will conform to the natural curvature of your lid rather than fighting against it, which is the single most common cause of inner-corner lifting.
One pro technique: wrap the lash around the handle of a makeup brush for 30 seconds. This pre-curves the band to match your eye's natural shape.
Step 3: Apply Adhesive Strategically
Apply a thin, even line of lash adhesive along the band. Then — and this is the step most tutorials skip — apply an extra dot of adhesive at both the inner corner and the outer corner of the band. These are the two points that experience the most movement and friction throughout the day, and they need reinforced bonding.
Wait 30 to 45 seconds for the adhesive to become tacky. This is non-negotiable. Fresh adhesive is wet and slippery. Tacky adhesive has begun to set and creates an immediate mechanical grip on the skin. If you apply too early, the lash will slide around and never set properly.
Step 4: Placement and Press
Using a lash applicator or a pair of curved tweezers, place the lash band as close to your natural lash line as possible — not on top of your natural lashes, but against the base of them, on the skin. Start with the center of the band, press it down, then secure the inner corner, then the outer corner.
Hold each corner for 10 seconds of firm, steady pressure. This is where the adhesive's bond is forming. Do not release and re-adjust — you will break the seal. If the placement is wrong, lift the entire strip off, clean the band, and start over.
Step 5: The Pinch and Seal
Once the lash is in place, use the flat edge of your lash applicator (or a clean, flat makeup brush handle) to press the false lash band and your natural lashes together. Run the tool along the entire lash line from inner to outer corner. This creates a unified bond — the false lashes and your natural lashes are now pressed together with adhesive between them, which is far more secure than the band alone sitting on the skin.
Then pinch your natural lashes and the false lashes together using your fingertips for 15 seconds. This final step ensures the adhesive has created a complete seal between the two lash layers.
The Longevity Layer: What to Do After Application
The application is not the finish line. There are two additional steps that will determine whether your lashes survive the full wedding day.
The Setting Step
After your lashes have set for five minutes, apply a thin line of black liquid eyeliner along the lash line, covering any visible band or gap between the false lashes and your skin. This does two things: it camouflages any adhesive that has become visible, and it adds a secondary physical barrier that helps hold the band in place.
Skip mascara on your false lashes — the fibers are already dense enough, and mascara adds weight that can cause the band to droop. If you want more volume, apply one thin coat of mascara to your natural lashes only, before you apply the false lashes. This creates a thicker base for the false lashes to bond to.
The Touch-Up Kit
Pack a small emergency kit in your clutch or hand it to your maid of honor. It should contain: a travel-size tube of lash adhesive, a pair of tweezers, a small mirror, and two oil-blotting sheets. If you feel a corner lifting, do not press it down with your finger — you will introduce oil and bacteria. Instead, dab an oil-blotting sheet near (not on) the corner, apply a tiny dot of fresh adhesive with a toothpick, and press the corner down with the tweezers for 10 seconds. The entire process takes 60 seconds.
Comparing Lash Types: Traditional Glue Lashes vs. Glue-Free Alternatives
There is a meaningful difference in how lash systems behave under extended-wear conditions, and it is worth understanding the mechanics before you commit to one for your wedding day.
Traditional glue lashes rely on a chemical adhesive — typically a latex-based or latex-free lash glue — that bonds the lash band to your skin. This bond is strong initially but degrades when exposed to oil, moisture, and friction. On a wedding day, all three are present in abundance. Traditional glue lashes also require the 30-to-45-second tacky wait time, which is hard to achieve when you are getting ready in a bridal suite with limited time and a makeup artist working on a schedule.
Glue-free lash systems — sometimes called self-adhesive or press-on lashes — use a pre-applied adhesive strip on the lash band itself. The bond is mechanical rather than chemical. This means it is not affected by skin oil or moisture in the same way a chemical adhesive is. For a bride who will be crying happy tears, hugging a hundred people, and dancing in a warm reception hall, this distinction matters.
The trade-off historically has been that glue-free systems did not achieve the same level of hold as a well-applied traditional glue lash. But the technology has advanced significantly, and the gap has narrowed. The best glue-free lashes now use a dual-layer adhesive system — a base layer for immediate tack and a top layer that sets over the first minute of wear, creating a bond that is comparable to traditional glue but without the degradation from oil and moisture.
For wedding-day wear specifically, the calculus shifts. A lash that holds for 14 hours in variable conditions is worth more than a lash that holds for 8 hours in perfect conditions. The reliability factor — knowing your lashes will not fail at an unpredictable moment — is the entire point.
What to Look for in a Wedding-Proof Lash
Not all lash systems are created equal for extended-wear events. Here is the checklist you should use when evaluating any lash for your wedding day:
- Band flexibility: The band should bend easily when you flex it and return to shape without kinking. A rigid band will not conform to your eye's natural curve.
- Weight distribution: The lash should feel nearly weightless when you hold it. Heavier lashes pull the band away from the skin over time, creating a gap that leads to lifting.
- Adhesive system: For glue-free options, look for a dual-layer or pressure-activated adhesive — not a single strip of generic sticky material. The adhesive should feel tacky immediately upon application and strengthen over the first 60 seconds.
- Fiber quality: Synthetic fibers (PBT or silk) hold their curl better than natural fibers, which can droop over hours of wear. For weddings, synthetic is the more reliable choice.
- Reusability with integrity: A high-quality lash should be wearable 20 to 30 times without the adhesive degrading or the band losing its shape. This matters for wedding events — rehearsal dinner, ceremony, reception — where you may want to wear lashes for three consecutive days.
Why PHANSTA LASHES Are the Right Choice for Your Wedding Day
If you have read this far, you already know what you need: a lash that survives tears, humidity, fourteen hours of wear, and two hundred photographs without lifting, shifting, or requiring a mid-reception bathroom fix. That is a specific set of requirements, and most lashes on the market were not engineered for it.
PHANSTA LASHES were built for exactly this scenario. The flexi-band is under 0.5mm, so it sits flush against your lash line and disappears in photographs — no visible strip, no gap, no telltale shadow. The dual-layer adhesive system activates on contact with your skin and strengthens over the first minute, creating a mechanical bond that is not compromised by oil, moisture, or the occasional happy tear. No glue, no tacky wait time, no chemical adhesive degrading on your skin over fourteen hours.
The fibers are premium synthetic PBT, which means they hold their curl from the morning prep photos to the last dance. The weight distribution is engineered so the lash feels like nothing on your lid — which means it stays put. You will not feel the need to touch, adjust, or press it down throughout the day, because there will be nothing to fix.
Brides who have worn PHANSTA LASHES for their wedding days consistently describe the same experience: they forgot they were wearing lashes. Not because they stopped caring — because the lashes simply performed. No lifting at the inner corners during the ceremony. No drooping at the outer edges during the reception. No emergency touch-up in the bathroom between the cake cutting and the bouquet toss. Just lashes that did what they were supposed to do, all day, without being asked.
Available in styles that range from the natural wispy to the dramatic flutter, PHANSTA LASHES offer a wedding-appropriate option for every aesthetic. The brand offers multipacks designed specifically for wedding events — one pair for the rehearsal dinner, one for the ceremony, one for the reception — so you never have to stretch a single pair across three days of events.
Your wedding day is not the day to experiment, improvise, or hope for the best with your lashes. It is the day to choose a system that has been engineered for the exact conditions you will face. Apply them once, trust the bond, and spend the rest of your day being a bride — not a woman checking her outer corners in every reflective surface you pass.
You now have the full protocol: the prep, the application, the longevity layer, and the emergency kit. You know what to look for, what to avoid, and why. The only thing left is to choose the lash that will hold up to everything you just learned — and PHANSTA LASHES are ready when you are.
Stop Struggling with Glue — Try PHANSTA LASHES Today
Thousands of women have switched to PHANSTA LASHES. No glue, no damage, no complicated application. Just beautiful lashes that stay perfect all day.
SHOP PHANSTA LASHES →