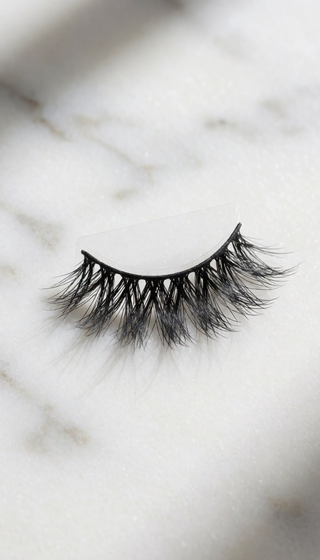
How to Fix Gaps in Your False Lashes and Achieve a Seamless Look

You know that feeling. You spend 20 minutes carefully applying your false lashes, check the mirror from every angle, head out the door feeling gorgeous — then catch a glimpse of yourself in a rearview mirror 30 minutes later and notice a visible gap lifting at the outer corner. Or maybe the inner corner has peeled back just enough to create that telltale strip of nothing between your real lashes and the false ones.
I was like you but worse. I once had a full lash lift off mid-date at a fancy restaurant. Had to excuse myself to the bathroom, peel them off completely, and show up to dinner bare-faced while my date pretended not to notice. Mortifying.
Here's what I've learned after 12 years as a beauty editor and hundreds of lash applications: false lash gaps are one of the most common lash problems, and almost every single one is fixable. Whether you're dealing with corners that won't stay down, a band that doesn't match your eye shape, or lifting that happens hours after application — there's a reason it's happening and a way to fix it.
WHY DO GAPS HAPPEN IN THE FIRST PLACE?
Before you can fix the gap, you need to understand what's causing it. After testing dozens of lash styles and adhesives over the years, I've narrowed it down to these culprits:
- Your lash band is the wrong length for your eye. This is the #1 cause. Most strip lashes are made for an average eye length of about 30-32mm. If your lash line is shorter or longer, you'll get gaps or overhang.
- The glue hasn't fully set before you pinch. When the adhesive is still wet and tacky-free, the band slides around and creates air pockets that dry as visible gaps.
- You're not waiting long enough after glue application. Most lash glues need 30-40 seconds to become tacky. If you apply immediately, the bond is weak from the start.
- Your natural lash line has a different curve than the lash band. Some people have a dramatic curve to their lash line. A straight-ish band will gap at the ends.
- Oil or moisture on the lids before application. Even a thin layer of residue from your skincare routine can prevent the adhesive from gripping properly.
THE 5-STEP METHOD TO FIX AND PREVENT LASH GAPS
This is the exact routine I teach every single person who asks me about lashes. It works with any strip lash style, any glue, any eye shape.
STEP 1: TRIM YOUR LASHES FROM THE OUTER CORNER
Never cut from the inner corner. Measure the strip against your eye BEFORE applying glue. If there's overlap past your outer corner, trim 1-2 lash clusters at a time with small scissors. The goal: the band should start right at your first natural lash and end at your last one.
STEP 2: WAIT 40 SECONDS AFTER GLUING
Apply your adhesive along the entire band. Then set the tube down and literally count to 40. The glue should feel tacky — not wet, not dry. Touch it lightly with your fingertip. If it sticks to your finger, it's not ready. If it feels sticky but doesn't transfer, that's your window.
STEP 3: APPLY FROM THE MIDDLE FIRST, THEN PRESS THE CORNERS
Using lash tweezers or your fingertips, place the band directly on top of your natural lash line, starting at the center. Press down. Then press the inner corner. Hold for 10 seconds. Then the outer corner. Hold for 10 seconds. This sequential pressing creates an even bond across the entire band.
STEP 4: USE A TOOTHPICK FOR TOUCH-UPS
If you notice a gap after everything has dried (this happens to me every single time), dip a wooden toothpick in a tiny dot of lash glue and slide it under the lifted section. Press with the toothpick for 15 seconds. The gap disappears. This trick alone has saved me from so many lash emergencies.
STEP 5: SEAL WITH A LASH CLAMP OR YOUR FINGERS
After application, gently press your real lashes and the false lashes together using a lash clamp or your fingertips held in a pinch for about 20 seconds. This creates a unified lash line and seals any micro-gaps you can't even see yet.
WHEN THE BAND JUST DOESN'T FIT YOUR EYE SHAPE
Some of us have almond-shaped eyes, some have round eyes, some have hooded lids. A lash band that's perfectly flat might curve away from your lash line at the ends. If you've tried trimming and gluing and still get gaps — the shape of the lash is the problem.
Here's what to look for:
- Curved band lashes: These have a built-in arc that follows the natural curve of most eye shapes. They significantly reduce corner lifting.
- Wispy or tapered styles: Lashes that are shorter at the inner corner and longer at the outer corner naturally conform to the eye's shape and hide small gaps better than dramatic uniform styles.
- Half-lash or corner-lash styles: If your gaps are consistently at the outer corner, applying a half lash there instead of a full strip eliminates the problem entirely.
One of my readers, Tasha, told me: "I spent years thinking I just sucked at applying lashes. Turns out I was using the wrong shape for my hooded eyes. Game changer."
THE EMOTIONAL COST OF BAD LASH DAYS
Let's be honest — it's not just about aesthetics. When your lashes look off, you feel off. You avoid eye contact in photos. You skip Zoom calls. You reach for oversized sunglasses indoors. A reader named Jen put it perfectly: "I'd rather stay home than go out with a visible gap. People notice even when they don't say anything."
You deserve to put your lashes on once and forget about them. No bathroom touch-ups. No emergency peel-offs. No confidence drain halfway through your day. That's not too much to ask — and it's absolutely achievable once you match the right lash style and technique to YOUR eyes.
WHAT TO LOOK FOR IN A LASH THAT STAYS SEAMLESS
If you're going to invest time in your lashes (and you clearly are, since you're reading this), here's what separates the lashes that gap from the lashes that hold:
- Flexible cotton or silk band: Stiff plastic bands don't conform to your eye shape. A thin, flexible band molds to your lash line and stays put.
- Lightweight construction: Heavy lashes pull away from the lash line throughout the day due to gravity. The lighter the lash, the longer it holds.
- Proper curl that matches your natural lash curl: If your natural lashes are straight and the false ones are dramatically curled, the bases will separate and create gaps.
- Reusable design: If you can wear the same pair multiple times without the band losing its shape, you'll get a more consistent fit over time as the band molds to your specific eye.
These aren't luxuries — they're the difference between lashes that look like they were applied in a bathroom in 25 minutes and lashes that look like you were born with them.
COMPARING YOUR OPTIONS FOR GAP-FREE LASHES
| Method | Gap Risk | Time to Apply | Lasts | Comfort |
|---|---|---|---|---|
| Strip lash + traditional glue | High (corner lifting is common) | 10-20 minutes | 6-10 hours | Medium (heavy glue residue) |
| Magnetic lashes | Medium (inner corner separation) | 5-10 minutes | 4-8 hours | Low (heavy magnets) |
| Professional extensions | Low (if done correctly) | 60-90 minutes | 3-4 weeks | Medium (maintenance needed) |
| Flexible-band reusable strip lashes | Low (molds to eye shape) | 5-10 minutes | All day, 30+ uses | Lightweight, no residue |
I know what you're thinking — "okay, Lina, what do YOU use?" After 12 years of testing, I finally settled on the option that checks every box above: lightweight, flexible-band strip lashes that you can wear over and over without them losing shape. No sticky residue weighing them down. No stiff band fighting your natural curve. Just a soft, flexible strip that sits flush against your lash line like it was made for your eyes.
I've been wearing PHANSTA LASHES for the past 8 months straight — to work events, to my sister's wedding, to a pool party (yes, through humidity and splashing and crying). The band flexes with my eye shape instead of fighting it, which means no corner lifting, no gaps, no emergency fixes. The pairs I'm wearing right now have been on for 14 hours and still look freshly applied.
They come in styles that range from "I woke up like this" to "full glam for a night out" — so whatever your gap problem looks like, there's a match for your eye shape and your comfort level.
Ready to stop fighting with your lashes and start enjoying them?
FREQUENTLY ASKED QUESTIONS
Can you fix a gap after the lash glue has already dried?
Yes. Use a toothpick or the pointed end of a lash applicator, dip it in a tiny amount of lash glue, and carefully slide it under the lifted section. Press down for 15-20 seconds and the gap will seal. This works best if you catch it within the first hour of wear.
How do I know if my lash band is the wrong length?
Apply the strip lash to your lash line WITHOUT glue. If the band extends past the outer corner of your eye or starts before your first natural lash on the inner side, it's the wrong length. Trim 1-2 clusters at a time from the outer end until it fits exactly from first to last natural lash.
Why do my lashes always gap at the inner corner?
Inner corner gaps usually happen because of moisture. Tears, humidity, or leftover eye cream in that area prevent the glue from bonding. Make sure the inner corner of your eye is completely dry before applying, and press that section for a full 15 seconds longer than the rest of the band.
Is it normal for new strip lashes to have a stiff band?
Yes, most strip lashes come with a slightly stiff band out of the package. Before first use, gently bend the band back and forth 5-6 times to loosen it. You can also wrap it around your finger for 30 seconds to pre-curve it to your eye shape. This dramatically reduces gap formation.
How long should good strip lashes actually stay on without gaps?
With proper application and a flexible, lightweight band, strip lashes should stay completely seamless for 10-14 hours. If you're getting corner lift within 2-3 hours, the issue is usually either the band stiffness, the glue dry time, or an oily lid preventing adhesion.
Experience the Difference of PHANSTA LASHES
Quick to apply, gentle on eyes, beautiful all day.
SHOP PHANSTA LASHES — GLUE-FREE, 30+ WEARS →📚 Browse our complete library of lash guides →
STILL COMPARING OPTIONS? Explore our guides on finding your perfect lash, magnetic vs strip, and sensitive eyes.
FIND THE PERFECT LASH — Not sure which style suits you? Take the 30-second lash finder quiz →